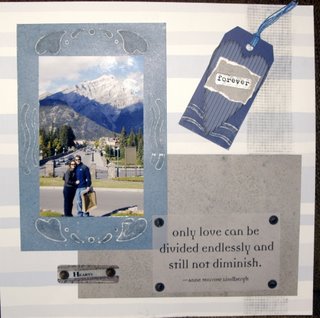
Frame photos, make an instant border, or use individually embossed elements as embellishments to add charisma to your pages.
However you choose to use the technique, the outcome is fantastic.
To step up your basic embossing, try to make each page your own by adding a little extra to your embossed images.
My favourite 'extras' are sanding and chalking.
These techniques are fast, easy, and inexpensive, but they take a so-so layout and make it perfect.
Sanding is quite simple. All you need is an embossed image and a small piece of fine grade sand paper.
Lightly rub the sand paper over the embossed image, being careful not to tear the paper. This will give the image a rough, grainy look and a nice, white outline.
Tip: If you are using cardstock, you won't see white, but the edges will still look rough and texturized.
To chalk the images, simply rub chalk onto the raised part of the image with an applicator (a cotton swab or a makeup sponge work well) until you've achieved the desired look, and gently shake off extra chalk dust.
Tip: Chalk erasers are a great tool for scrapbookers. Any mistakes you make while chalking can quickly be righted with this handy invention
You decide how you want it to look by choosing the chalk colour and how much you apply. You can trace the inside of the emossed design or you can chalk the whole image.
Tip: Feel free to use different colours on the same design (ie. a flower in a pot: use different colours of chalk to make the flower pink, the stem green, and the pot a terra cotta orange).
In this picture, I chalked the designs with black chalk, shading the whole element in, and then rubbed sandpaper lightly over top, to help the designs stand out.

Both of these techniques call attention to embossed elements which could otherwise go unnoticed.
For more great tips and how-tos, click on the article title. You will be directed to a great dry embossing site with information on how to emboss, what you need to get started, and great ideas to keep your creative juices flowing.

No comments:
Post a Comment