Sometimes the best things in life are BIG!
Instead of using a few smaller embellishments on each page layout, mix it up with one, solitary element.
Use the new big brads or one big flower on your pages. Have an oversized tag on your page for journaling or to decorate as an embellishment.
Not only embellishments look good big. Have one big, central photo on your page or use big letters for your titles.
You're probably thinking, if everything is bigger, my scrapbook will have to be bigger, too.
Not so.
You really only want one or two big elements on your page.
Make a few letters of your title larger than the others.
Have one large brad on your page and if you need more, use a few smaller ones.
Have one large element on your oversized tags.
Too many big elements make your pages look cluttered and messy.
Keep it simple, but feel free to play with it.
Tuesday, February 28, 2006
Tuesday, February 21, 2006
Tip # 99
Dried flowers are very delicate.
When using dried flowers on a page layout, make sure to adhere it firmly to the page, with adhesive behind every inch of the flower. If not, it will crumble and your page will have to be repaired.
Mod Podge is a good way to adhere flowers and keep them intact.
When using dried flowers on a page layout, make sure to adhere it firmly to the page, with adhesive behind every inch of the flower. If not, it will crumble and your page will have to be repaired.
Mod Podge is a good way to adhere flowers and keep them intact.
Monday, February 20, 2006
Too Many Pictures!!
My husband and I look like tourists everywhere we go.
We have a wide array of cameras (both digital and 35mm) as well as a video camera which we like to carry around on every hike we go on, every walk we take with our puppy, every event which may provide us with a few magical 'Kodak Moments' we like so much.
For those of you out there who share our love of photos and are stuck trying to play catch up all the time with your scrapbooking, have I got a deal for you.
You don't have to limit yourself and only scrapbook a few pictures, even though there are six really good pictures or lock yourself in a room with scrapbooking supplies and food for a week to try and scrapbook a single event that you went a little crazy at. Use them all on one layout.
Say what??!!
You heard me.
There are so many creative ways to use up a big group of photos and still have time left over to tackle other projects.
Try to keep a focal point on your page. This is still an important design practice.
Keep one photo slightly larger than the others to keep pages from looking cluttered. This will keep people viewing your layout from getting overloaded trying to take it all in.
Keeping that in mind, have fun with it. Here are a few techniques I like to use:
Try to 'hide' photos or journaling under another photo. Use hinges, and have the top photo open like shutters to reveal another, smaller photo underneath.
Trim secondary photos (those not as captivating as your main picture) tightly, so they are quite small. These can be used on tags or even in a photo collage.
Make your embellishments out of photos. Trim someone's funny face out of a picture and use it as the centre of a flower or cut out a few elements from photos to use as a border.
Have fun with it, but do be careful not to overdue it. Clutter is not good.
Keep the focus on your photos and your design clean.
Sunday, February 19, 2006
Sew Perfect
If you're a crafty person with multiple hobbies why not add a few of them to your scrapbooks?
Why not showcase two talents at once??
One of the greatest crafty combinations has brought together sewing and scrapbooking.
Bring a needle and thread to your layouts for a homey, well-loved look; like wrapping your memories in a beautiful, hand-made quilt.
If you're looking for something a little edgier, use zigzag stitches to hold together random strips of torn paper.
Whatever look you're going for, adding sewing to your pages is a terrific way to keep your pages unique and aesthetically pleasing.
Quick Tip: If you're scared of needles, or just lack the time and patience for needle threading, you can buy rub-on stitches, or even just use a pen to draw 'stitches'.
Saturday, February 18, 2006
Sketchy
Another way to speed up your scrapbooking is to keep sketches of your page layouts.
Often, it's hard to decide how to place photos, journaling blocks, and embellishments and you end up wasting time playing with them. If you keep sketches, you can either use or adapt an old layout in no time.
Each time you finish a layout, make a small, basic sketch of your design (3" x 3" is big enough) and add it to your collection. Simply store them in a binder or duotang so you have instant inspiration whenever you are stumped.
To further speed up the process, divide the sketches into sections based on the number of photos you use, as scrap maps did with their website, http://www.scrap-maps.com/
Have a section for one picture layouts, two picture layouts, three picture layouts, and many picture layouts. When you're looking for inspiration, you can thumb through the appropriate section and find a layout fast.
You can also adapt and expand upon this idea to include sketches of cards, calendars, or embellishments.
Friday, February 17, 2006
Cute as a Button
Buttons are an inexpensive scrapbooking element that can add so much to a page design.
· Use buttons to ‘hang’ elements on
· Scatter buttons randomly along one edge of a page for a great 3-D border
· Place buttons all around a photo or a journaling block to make a photo frame
· Use those old brown and beige buttons that you can never find a use for to make ‘sand’ at the bottom of a beach page
Don’t limit yourself to the buttons on your husband’s work shirts, feel free to experiment with specialty buttons as well.
You’d be surprised what you can find in your local craft store. They have buttons shaped like everything from flowers to army helmets to letters so you can use them on any kind of layout.
Whether sewn in place or simply fastened with an adhesive, buttons can make your pages pop.
You’ll love ‘em!
Tag, You're it!!
Tags are such a great addition to any layout (and are another way to use up scraps).
Use tags of all shapes and sizes to add interest to your pages.
Use them as a photo mat for a picture
Add journaling to your page by writing on a tag
Write your page title on a tag
Use them as an embellishment (decorate them with letters, fibres, punched out shapes, buttons, bottle caps, or anything else you can find)
Tags are also a great way to add depth. You can loop ribbons or fibres through the hole at the top to make your tag stand out.
Also, if you're like me and have a lot of pre-cut tags laying around, use them to make quick gifts.
A tag book is a great gift that you can make in no time. Link a few tags together with ribbon to make a mini scrapbook. Your friends will love it.
Keep brag pictures handy with a 'keychain keepsake'. Decorate a tag with your favourite picture and then laminate the finished project. Punch a hole in the tag and you're ready to go.
Tags are such a great way to add a little extra to your pages.
For free tag downloads, click on the title and you'll be forwarded to a site that lets you download free tags that are all ready decorated for you and ready to use.
Thursday, February 16, 2006
Time Saving Tips
Scrapbookers are always looking for more time.
A few extra minutes to finish a project.
An evening to learn a new technique, or take a class.
A weekend with nothing planned, where you could really attack the ever-growing pile of pictures on your desk.
Sometimes these moments are hard to come by. Make sure that you milk every minute of your scrapbooking time with a few of these time saving tips.
• jot down some ideas
Keep pads of paper handy and scribble down design ideas while you're on the phone or as they come to you throughout the day. You'll have a layout design ready to go the next time you sit down to scrap. Don't forget about those cute things your dog does or something your husband says that always makes you smile. Record your daily thoughts or special events in a book for quick and easy journaling.
• keep your supplies handy
Convert a spare room into a scrapbooking zone where you can keep supplies and projects readily available. This eliminates at least ten minutes of searching and gives you more time to spend with your addiction...err, hobby.
• do a few layouts using one technique
For some reason, I can't help but scrapbook in chronological order. I like to start at the top and work my way through to the bottom. However, the quickest way to get things done is to pull a few pictures out and use the same layout, or if you're using a specific technique, use it twice, apply it to both pages. This way, you're only taking the tools out once and getting twice as much done.
note: If you use scrapbooks with top-loading page protectors, you can easily shuffle pages around as you go.
Any of these ideas can keep you scrapbooking and help you avoid wasting precious time with preparation or the oh-so-common scrapper's block.
Once you find a way to spend more time scrapbooking and less time getting ready to scrapbook, you'll enjoy your hobby even more.
Wednesday, February 15, 2006
Precious Scraps
While most scrapbookers keep a trash can handy to rid themselves of dreaded scraps, the most savvy scrapbookers sweep them into an envelope for future use.
One person's garbage is another's treasure, right? Well, after you see all of the uses for those scraps you carelessly toss, you'll be elbow deep in your trash can, looking for yesterday's toss-aways.
Use scrap paper for any kind of small project you have on the go.
Sounds so simple.
Take a minute to think of how great that really is. Use up all of those scraps you would normally toss, and save that great 12 x 12 page you were only going to use 3 inches of.
Well, that's fine, but what if you don't do 'small' scrapbooks?
No worries!
Use your scraps to make greeting cards (just think of all the paper you could have used on Valentines).
Decorate tags with small pieces to accentuate your layout or use them to punch out designs or make an original embellishment.
Use tall, skinny scraps for borders.
Let your kids use the scraps to make their own scrapbooks.
Use your tiniest scraps to make your own paper.
The possibilities really are endless.
Now, if you're eyeing your garbage can, thinking, "I bet those scraps are still in good shape," it's not worth it.
If you're a scrapbooker, I guarantee there will be more.
Start tomorrow.
Saturday, February 11, 2006
Tie One On
My favourite scrapbooking element of the moment is ribbons.
They are so fun to play with and add dimension and character to page layouts.
The best part??
They're dirt cheap, if you even pay for them.
Now, in saying that, I'm not promoting shoplifting. I'm not saying, "it's small, so pocket it." There are just lots of great places to find ribbon out there that you may not think to look.
Ribbons can be found at garage sales, sale bins at craft stores, or even in your own basement (remember what you used to tie in your hair?? Bet you still have some).
Tie a few on to a page to see how they can balance elements or bring focus to a picture. A few ribbons held in place by a brad or a staple or even sewn in place can make your pages so much fuller.
You can also use ribbons to 'hang' photos on your pages. Try using ribbons as ready-to-use borders, or add ribbons to a tag.
Play with it.
Tie one on.
Thursday, February 09, 2006
Workshops
I've been a scrapbooker for many years and have heard rumours about the backrooms of some scrapbooking stores.
I'd heard they had tons of workspace and tools that you could use. Sounds like fun.
Now, as a rural person, I never lived close enough to a scrapbooking store to venture into one of these rooms, but the other day, with a bit of time to kill, I thought, "what the heck, let's see what all the fuss is about."
My first time was in the Scrapbooker's Paradise in South Calgary.
I will never be the same again.
I ventured into the elusive backroom only to find it wasn't as elusive as I'd thought.
Not only were there people in there from every age group, but every skill level as well. All these years I'd thought it was a place for the elite. The Olympians of all scrapbookers.
I was welcomed with open arms and thousands of the coolest tools that I've always wanted to learn to use.
My mind started racing.
How could I possibly make the best use of my time?? How much time could I possibly spend in here and still get all my errands done??
Walls of punches of all shapes and sizes, die-cut machines with thousands of different templates, inspiring layouts hanging on the walls....
My heart was pounding.
I was mentally erasing errands off my list.
All of the possibilities were flashing before my eyes.
I grabbed my bag of paper and started punching.
Two and a half hours later with a rumbling tummy (I had long ago missed lunch) and a new bag of goodies clenched tightly in my aching fingers, I reluctantly left the workshop.
With BIG plans to return.
Since I've returned home, which is about two hours away from my newfound scrapbooking heaven, I'm preparing myself mentally for the next opportunity to run that die-cutting machine over fresh scrapbooking paper.
I will be better prepared next time.
I will pack ample food and water to keep my energized and hydrated.
I will bring a variety of papers and a thousand pieces of napkins with my ideas sketched on them.
I will tell all of my friends of the joys and excitement that lays behind those back walls.
I will return to my newfound heaven.
And I will be ready.
Wired
Wire is a very versatile element that can be added to any page.
Most craft stores carry a variety of coloured wires of all thicknesses, but ordinary wire you find laying around the house works as well (just make sure it’s not hooked up to something).
Whatever wire you use, be aware of sharp, jagged edges. They can damage photos or puncture holes in your page protectors, if they’re not filed down properly.
Wire is so easy to manipulate you’ll literally find hundreds of uses.
Here are a few:
• Run a piece of wire through a paper crimper for a new, wavy look (place the wire between two pieces of paper to protect your crimper).
• Fold it into any number of designs: flowers, leaves, curly-cues, any simple shape that would add to your layout is at your fingertips when you have wire on hand.
• Use wire to make a page title. It’s remarkably easy to turn wire into beautiful cursive.
• ‘Hang’ elements using wire.
• String beads on wire to make a 3-D border for photos or entire layouts.
Remember, any time an article interests you, click on the title (in this case, wired) to be sent to a page with further information, related articles, or great free stuff!
The Beauty of Vellum
Vellum is a great addition to every scrapbook.
There are hundreds of techniques that you can use to incorporate this versatile paper into
your layouts, the following are just a few ideas to help get you started:
• A simple square of vellum overlay can ‘quieten’ a loud or busy pattern.
• Journaling on vellum can add texture and a subtle layering effect to layouts (make sure you give the ink ample time to dry).
• A piece of vellum placed over the background of a photo can help focus attention on the subject.
• Torn vellum is a good way to add dimension to your page, without adding bulk.
• Crumple a bit of vellum and then flatten it with an iron (carefully) or press it in a book. This gives the vellum a unique crackle finish.
However you use it, you'll love the finished product. Vellum is a simple way to step up your scrapbooks.
Saturday, February 04, 2006
Seeing in Black and White
Black and white photos are classic.
Timeless.
Elegant.
Wedding photos, anniversary's, babies, kids playing in the park, dogs chasing a stick, all of these events can be captured in black and white.
Even if you don't take the photos in black and white, they can easily be altered. Using a basic photo program on your computer or even the machines at Wal-Mart, you can create black and whites out of any photo.
The best part of black and white photography is never having to wonder if the blue paper you chose really matches the blue in the photos.
Those days are over!!!
Once you've mastered basic black and white, try adding filters such as sepia, which gives photos an antiquated look.
Your Photos in the Spotlight
The best way to call attention to you photographic prowess is to make sure that your best photo is in the spotlight.
An easy way to make this happen is to save the most room for your favourite shot.
Having one photo on a layout that's bigger than all the others automatically draws your eye. This helps break up the monotony of 4x6 photos and keeps your layouts looking unique.
This doesn't mean you have to blow-up huge replicas of your photos (you can, but it can get expensive). To achieve this look, you can crop some of the other photos in your layout to keep the focus on your favourite.
One large photo can be balanced by a few smaller pictures on the same layout.
Also, change it up sometimes. If you always use three photos per page, shake it up a bit. Try a page with only one photo, or use five or six smaller photos (remember to still have one photo slightly larger than the others).
Another quick fix is using photo mats or embellishments to draw your eye.
Using a different paper to mat your favourite snapshot can draw your eye as well or you can use the same paper, but tear the edges or crimp it.
Simple embellishments, such as fibres or embossing, can add a great deal to a layout and set apart a special picture.
However you decide to do it, highlighting one picture per layout will focus the eye and keep your layouts fresh.
Thursday, February 02, 2006
Inspiration
Inspiration is one of the hardest parts of scrapbooking. Usually, scrapbooking is done in the few spare minutes you set aside for yourself in the evening, or those two spare minutes at lunch. Whenever you have the chance to sit down, you open up your box of photos and think, "where do I start?"
How can you expect yourself to have those creative juices flowing at all times? It starts to feel intimidating; whenever you get a moment to scrapbook, it seems like you get scrapper's block.
I know the feeling.
Some of my tips to keep your layouts looking fresh is to check out what other scrappers are doing. Look through your friend's scrapbooks. Maybe flip through a magazine or search online.
Sometimes, the most inspiring ideas can come from seeing a new technique or element that would be perfect for one of your pages.
You can also try taking a class or attending a workshop. There are so many people out there that you can learn from, why not utilize these resources?
Check with your instructor, sometimes they let you bring some layouts in and they can give you feedback.
There are numerous sources on the internet that are great at inspiring.
One of my favourites is http://www.scrap-maps.com/
This is a great place to find layout ideas and all the sketches are free. I promise, this site will get your creative juices flowing.
Wednesday, February 01, 2006
Taking better pictures
The point of scrapbooking is to showcase your photos and put your memories in their best life. In order to do this, you need to make sure each photo you take is the best it can be.
With digital cameras you have the luxury of taking as many photos as you can, so go crazy! Use those memory cards up. It will give you more options and allow you to better capture your memories.
Some quick tips:
1. Use the rule of thirds.
Everyone has heard this, but what does it mean??
Basically, move your subject off to the side when you're looking through the viewfinder. Divide your picture into thirds, both horizontally and vertically. The main focus of your picture should be located at the points where the lines cross.
2. Frame your pictures.

This could have been just another boring ocean picture, but by allowing some natural vegetation to frame the photo, you focus the attention, and include a creative element in your photos before they even hit the scrapbook page.
3. Look at things from a different angle.


These were both taken on a sailing trip. Instead of the usual scenery pictures, a little bit of creativity captured the beauty of life on the water.
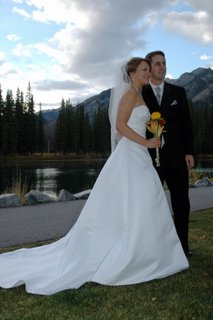
4. Take more vertical pictures.


People pictures should almost always be vertical. People naturally are taller than they are wide, so you can capture more of them with a vertical shot.
5. Use the light.


These photos both use light to accent the beauty of the moment.
The mountainscape is highlighted by the flare caused by the sun. It captures the juxtaposition between blue skies and snow-capped mountains.
The night shot of the Sydney bridge is lit up by the beautiful lights below. The reflection off the water adds colour and life to the photo.
The biggest tip is to just be creative and feel free to experiment with a few different techniques until you find the shot that captures the moment.
With digital cameras you have the luxury of taking as many photos as you can, so go crazy! Use those memory cards up. It will give you more options and allow you to better capture your memories.
Some quick tips:
1. Use the rule of thirds.

Everyone has heard this, but what does it mean??
Basically, move your subject off to the side when you're looking through the viewfinder. Divide your picture into thirds, both horizontally and vertically. The main focus of your picture should be located at the points where the lines cross.
2. Frame your pictures.

This could have been just another boring ocean picture, but by allowing some natural vegetation to frame the photo, you focus the attention, and include a creative element in your photos before they even hit the scrapbook page.
3. Look at things from a different angle.


These were both taken on a sailing trip. Instead of the usual scenery pictures, a little bit of creativity captured the beauty of life on the water.
4. Take more vertical pictures.


People pictures should almost always be vertical. People naturally are taller than they are wide, so you can capture more of them with a vertical shot.
5. Use the light.


These photos both use light to accent the beauty of the moment.
The mountainscape is highlighted by the flare caused by the sun. It captures the juxtaposition between blue skies and snow-capped mountains.
The night shot of the Sydney bridge is lit up by the beautiful lights below. The reflection off the water adds colour and life to the photo.
The biggest tip is to just be creative and feel free to experiment with a few different techniques until you find the shot that captures the moment.
Subscribe to:
Posts (Atom)
