Chipboard is a great new versatile element that you can add to scrapbook pages.
A while ago, I got some chipboard with sayings on them which worked great on some of my layouts, but others didn't work. The colour was wrong, the words weren't right, or something just didn't fit.
Since then, they've come out with blank chipboard embellishments that you can make to fit any layout.
I love the undressed chipboard letters that I just got. They're big enough to use as a main element on your page and come just plain (or undressed) so that I can stamp on them, cover them in paper, paint them, or bedazzle them if I really wanted to.
You can use them in your house to spell out words like Welcome or Spring or any word that you may want to decorate your walls with or you can use them in your scrapbooks, on cards, or calendars.
Your sold, right??
Just wondering where you can get these amazing new embellishments?
Well, chipboard alphabets and diecuts are sold at most scrapbooking or craft stores, but you can also make your own designs, once you've got the right tools.
If you click on this article's title, you'll be forwarded to a site that gives detailed instructions on making your own chipboard alphabets.
Here are a few ideas on where to get chipboard, quoted from http://www.scrapjazz.com/topics/Techniques/Embellishments/607.php so you can make your own embellishments:
"Many scrapbook stores have sheets of chipboard that they will give away for free. Packs of paper are often sold with chipboard to keep the paper free from damage, so many stores often have extra sheets that they just discard. Simply ask, and you may find yourself with a pile of free chipboard.
If youÂ’re looking for small pieces, many companies now sell small chipboard shapes. Bazzill Basics, Heidi Swapp, Lil Davis Designs and Making Memories all carry various sizes, shapes and designs of chipboard embellishments.
Most people probably have chipboard at home and donÂ’t realize it. Most any notepad has chipboard for the back cover. The back cover of spiral-bound notebooks are essentially chipboard as well.
If you still canÂ’t find chipboard locally, try searching online at www.ebay.com, www.dickblick.com, or www.vanguardcrafts.com."
They're very versatile and fun; adding dimension and festivity to any craft I undertake.
I would highrecommendend playing with some chipboard. It's inexpensive, fun, and easy.
Saturday, April 29, 2006
Sunday, April 23, 2006
New Hang-ups
Think all you've got is glue to attach your favourite photos to a page??
Think again!
There are so many ways to attach all of your elements without even touching a glue stick or messy adhesives.
Step outside of the box and embrace all sorts of ways to hold your pages together.
Here are a few decorative tools you can use to mount your pictures or elements onto your layout:
• brads
• paper hangers
• paper clips
• hinges
• staples
• buttons
• eyelets
These elements are great because they come in an assortment of colours and designs, but if you can't find exactly what you're looking for, you can easily decorate them to fit any page layout or theme.
Simply stamp, paint, ink, or cover them in paper to get the perfect look for your scrapbook.
If that isn't enough, try using some of these fibres to tie, hang, or suspend elements on your pages:
• ribbons
• hemp
• wire
• yarn
• velvet strips
• fabric
These materials are also versatile and add texture and flair to your pages that is sure to please the eye.
Don't get stuck in a glue-stick rut. There are a million tools out there that serve the same purpose and add a unique element of design to your scrapbooks, so keep your eyes peeled.
You never know what they'll come out with next.
Friday, April 21, 2006
Fun with slide mounts
Thought you finished with science projects in high school?
Think again.
Scrapbooking is taking a page from your old textbooks and turning it into a craft project.
Slide mounts are appearing in more and more scrapbooks and are catching more eyes than they would under a microscope.
A great way to accentuate the focal point of a picture, slide mounts can also be used to make 3-D embellishments, or to frame journaling or stickers.
These handy little frames highlight aspects of your layout that may otherwise slide by unnoticed and they're nice and thin, so they don't add a lot of bulk to your scrapbook.
They can be inked, stamped, painted, distressed or covered in paper or ribbon to match any layout so don't worry about them matching your layout, you can make them match.
Slide mounts don't have to be used sparingly. Use one or ten on any given page and see what kind of look you like.
Pick out your favourite elements of a photo and make sure everyone sees them the way you do with these handy little frames.
Maybe you want to cut up a few baby pictures to showcase cute fingers, toes, eyes, and ears?
Use the slide mounts to frame a few of your favourite things. Have a picture of yourself as the focal point and then have a few framed photos of scrapbooks, favourite candies, friends, etc.
Try your hand at a fun, crafty science project and see if you still feel the same way about science class.
Jewel-Tones
Scrapbooking tends to follow trends similar to the ups and downs of fashion.
Colours, patterns, and textures used in scrapbooking follow the fashion world closely, and the trend right now is modern jewel-tones.
Deep, rich colours are appearing all over scrapbooking magazines and in craft stores. These colours are extremely versatile and are an excellent way to accentuate the rich colours in your pictures.
All shades of brown, fushia, turqoise, emerald, purple, and orange are featured prominently in scrapbooker's supplies and are breathing life into the dull pages of the past.
These colours add an element of gypsy fashion to your layouts and are excellent for shabby chic layouts.
As with anything, the guidelines for how rigidly you want to adhere to trends is quite loose. If you're not sure about jewel-tones, start small with a few embellishments. You can easily mix colours to keep your own style in the forefront while embracing new colours.
Play with a few of these colours and see how they can transform boring pages and bring them to life.
Thursday, April 13, 2006
Creating Cards
Homemade cards are a great way to show people you care.
Remember how you could give your parents anything that you'd made and they'd love it? That wasn't just parental instincts. Everyone loves a gift that comes from the heart and homemade gifts are always the best.
Making cards for those near you is not only a great way to make someone's day, it's also a great way to fine-tune your scrapbooking skills and create something other than a page layout.
Creativity needs to be challenged in order to flourish, so step away from your scrapbook for awhile and make a few cards.
The best way to make cards is to create in bulk.
Be the Costco of card-making.
Why not make a few birthday cards if you have all the supplies out for one all ready?
Think of all the birthdays coming up, mother's day, father's day, weddings, baby showers, etc.
You'll be searching for a card in the not-to-distant-future and will be grateful to find a beautiful, handcrafted card ready to be addressed.
Card-making is also a great way to use up supplies.
If you have a pile of scrap paper that you can't bring yourself to throw away (and why would you?) why not use them on your cards?
Your scraps will be perfect for embellishments, titles, or even the card itself.
If you're like me, you get a lot of scrapbooking presents from people and sometimes it's hard to find a spot for all the stickers, sayings, or other odds and ends that you've accumulated over the years.
Cards are the perfect place to use them.
Got a bunch of Christmas stickers but never seem to take any photos that time of year? Use them up on Christmas Cards. People will love them and you'll use up some supplies.
Cards are fun, fast, and meaningful.
Spend some time on those closest to you and make them a gift from the heart.
Monday, April 10, 2006
Can't Resist
Nobody can resist learning a new scrapbooking technique; especially when it's a relatively inexpensive, easy-to-learn technique that you can use everywhere.
Resist ink can add a unique element to your scrapbook projects.
If you don't know what resist ink is, put simply, it's anti-ink.
Confused?
Don't be. It's really simple.
You used something similar to resist ink when you were younger, decorating Easter eggs.
First, you draw on the egg with a crayon or some kind of wax, and then dip it into the dye. Everywhere around your drawing would be dyed, but the ink wouldn't stick to the wax.
Resist ink is basically the wax.
If you were to stamp a design on your page with resist ink, and then blot around it with dye, you'd be left with a white outline of the stamp.
While resist ink is great for stamping, you can still use crayons or wax to create the same look.
Try writing your page title with a crayon and then blot an ink pad over your writing. Your title will pop out like a secret message.
You can use this technique almost anywhere. Create embellishments, highlight your doodling, or make your journaling stand out with these resist techniques.
Bonus Tip: If you want to design your own paper, simply crumple a piece of wax paper and then press it between two glossy cardstock pages (glossy side facing in). Iron the paper sandwich and then remove the wax paper and ink both pieces of cardstock. The papers will be marbled and appear texturized.
Easy as pie.
Sunday, April 09, 2006
A New Twist on Stamping Basics
Stamping is a great way to add an element of design to your scrapbooks.
Stamping is such an old crafting technique, it seems like there's not really much you could do with stamps that would make your pages seem modern.
Wrong!
There are so many uses for stamps, I couldn't possibly list them all in one article.
You can use stamps to create dimension, add colour, fill a space, journal, or even as the focal point of your page.
I know you're remembering the stamps you had as a kid. Once you'd stamped everything you owned with your name, there didn't seem to be much else left to do.
Well, you're much more crafty now, and there are a ton of options to look into.
You can use a basic ink pad for your stamping or you can step it up a notch and colour your stamps with inky felts. This way your image can contain more than one colour... flowers and their stems don't have to be the same colour anymore. You can have red flowers, green stems and leavevs, and a yellow ribbon holding them all together. How nice.
You can also heat emboss your stamped images to give them a raised, smooth look that will make them pop off the page.
You can stamp a pattern all over your backround pages to make your own unique paper. (If you combine this idea with some simple heat embossing, you can make those beautiful pages with the 3-D tecture that are so expensive in craft stores).
However you use your stamps, don't get stuck in an ink pad and rubber stamp rut, there are so many options out there right now, you'd just be limiting yourself.
Friday, April 07, 2006
Fun with Titles
The best attention-getting technique in scrapbooking is a great title.
This is your chance to grab people and draw them in to your scrapbook.
Why not lure your audience in with a few juicy words about your memories.
Here are a few ideas you can use to mix it up when you're designing titles, and keep in mind, the best titles make use of more than one technique.
• use die-cut letters
• throw in some tiny alphabet stickers
• heat emboss your title to make it 3-D
• print it out in a unique font on your computer
• use your own handwriting
• use stencils
• use the negative left over from a die-cut letter
• emboss it with a stylus
There are so many options and the best part is the more creative you get with your titles, the better the outcome.
Grab a scrap piece of paper and design your title keeping in mind the room you have available and the colour scheme you'd like to use.
Once you like your design, make it happen.
Let your creativity inspire you and you'll love the finished project.
Wednesday, April 05, 2006
Using up old Supplies
There's nothing more incriminating for a scrapbooker than a huge stash of supplies.
If you've ever declared, "It's just a hobby, I swear," you know where I'm coming from.
You can't pass your addiction off as a hobby if your house is full of paper, stamps, scissors, stickers, and all the other stuff that scrapbookers love to accumulate.
The best way to thin out your hordings is to do a little spring cleaning.
Get rid of those funky papers you've had forever and that stamp that got stuck years ago, you're never going to use them.
Why not thin out your supplies and make room for all the cool new stuff coming out daily?
A great idea to get rid of some of your unwanted supplies is to hold a scrap n' swap. It's just like a rummage sale held for you and your fellow scrappers.
Scrapbooking is very personal. While you may favour browns and greens, someone else loves the look of pastels. Why not trade so you can both go home with new supplies? You never know which one of your friends may find your discards a treasure.
Another idea for old supplies is to sell them on eBay.
You can buy anything online now, why not add your discards to the melting pot? They're cluttering up your precious scrapping space, so get rid of them and make some money.
If this sounds like too much hassle, and you're the kind of spring cleaner who just wants to get rid of their discards and be done with it, why not donate your supplies to a school, church, after school program, or a shelter that offers classes for kids?
Make your discards disappear and come home feeling warm and fuzzy. What a great way to help out in your community.
These are just a few ideas for all of you thinking of cleaning up your supplies and making those incriminating piles shrink.
Spring cleaning will help organize your workspace and reduce clutter saving you time and energy so you can enjoy your 'hobby'.
Tuesday, April 04, 2006
Scrappin' With Kids
One of the best ways to spend time with your kids is doing something you both enjoy.
Why not steer your kids away from the television and get their creativity pumping by introducing them to the wonderful world of scrapbooking??
Just think of all the great things that can come from this....
First, as I mentioned earlier, you're inspiring creativity.
What a great facet for those creative juices that all kids have.
Second, it's a great way to spend time together.
Sometimes, things get so hectic, we forget about the precious things in life, why not bump them up on your list of priorities?
Third, what a great way to use all those old papers and scraps that you've had forever.
Can't find a use for a crazy set of stickers you bought on sale? Looking for a use for that neon pink paper you bought ten years ago? Kids love wild colours and outlandish elements.
Fourth, what a great way to gain some insight into your children's lives?
Learn their favourite colours, laugh at their stories, and enjoy their youthful approach to scrapbooking. Maybe you'll even learn a thing or two.
What can it hurt?
If you have kids, great, get them involved. If not, why not see about teaching a class in your community? You will not only learn things about them, but about yourself as well.
Monday, April 03, 2006
archival safe scrapbooking
Scrapbooking can be a time consuming, expensive hobby.
The mementos that you have when you're finished make up for any time or money you may have spent, but you want to ensure that these keepsakes can be treasured for years.
By using only archival safe products, you can ensure the safety of your scrapbooks.
The key is to use lignin-free and acid-free products.
These products are the most commonly advertised products fro scrapbooking, but there are other things to keep in mind.
Ensure that your page protectors are PVC-free; PVC releases fumes that can destroy pictures and even paper that you use in scrapbooking.
Use ink that is permanent and safe, gel pens are a good option.
Also keep in mind where your photos were stored before you put them in your scrapbook.
Magnetic albums, or the albums with tacky pages and plastic overlays, have been proven to be harmful to your pictures. Your photos may begin to discolor or become brittle in time if stored in a magnetic album.
Even if you remove the photos and there's some tacky residue left on the back of the photo, it could ruin your page layout as well as your picture.
By keeping these things in mind when you're scrapbooking, you can help ensure that your keepsakes last.
Thursday, March 23, 2006
Tip #9
I always look forward to looking through scrapbooking books for new ideas.
It is so easy to pique your creativity by looking at other people's page layouts.
I have read a lot of books and almost all of them will leave you with at least one idea that you can't wait to try on your next page layout, but my all time favourites are the Creating Keepsakes books.
The books are a collection of the best layouts from the Creating Keepsakes magazine and are full of inspiring ideas.
Everytime I get a new one, I go through a whole pad of paper making bookmarks for all of the great tips and techniques on every page.
My favourites so far are Scrapbook Tips and Techniques and Award-Winning Scrapbook Pages.
Check them out, you'll love them.
Wednesday, March 22, 2006
Scrapbook Themes
There are so many things going on in your life that could easily become a scrapbook.
Everyone has seen the traditional scrapbooks. Pages of photos, colourful papers, and beautiful embellishments. Why not try to expand your horizons. Scrapbook everything in your life, your mind, and your heart.
I recently read a few pages from an expectant mother who scrapbooked the changes and excitement of pregnancy. She hardly used any pictures, just journaling, a few images, and embellishments, and that was it.
While it was relatively simple, what a keepsake it would be for her child.
Most of my scrapbooks are daily life events: hikes, trips, friends, nature, etc. Things that I take pictures of to remember.
Why not leave your pictures for a while and explore other areas of scrapbooking?
Scrapbook your goals, your hopes, or make a scrapbook with a message to give to someone else.
These scrapbooks don't have to be 12 x 12, why not use up some of those tags that you have lying around and make a tiny tag book?
This doesn't have to be a project that you show everyone, as they come through the door. Not all scrapbooks have to be on display for everyone to see.
Scrapbooking can be therapeutic, so why not create an album that allows you a chance for release?
There are many ways to capture a moment, a memory, or even a feeling. Why not do your best to treasure everything about yourself, the good, the bad, and the photogenic?
Digital Scrapbooking
While some people love the sensory experiences involved in creating a scrapbook, some bypass the clutter and embrace the simplicity of digital scrapbooking.
There are a number of websites that sell digital embellishments, papers, fonts, and anything else you may need to create the perfect layout.
The process is similar to traditional scrapbooking in that you pick a background paper and build up with any embellishments you wish to add.
Here are a few sites that seel digital scrapping materials:
http://www.twopeasinabucket.com/digitalKits.asp
http://www.twopeasinabucket.com/shopFonts.asp
http://www.macscrapbook.com/indexgoogle.html
While there are many programs specifically designed for scrapbooking, many page layout programs have similar capabilities. Check out the programs you have on your computer before you invest a lot of money in software.
If you decide to make an investment, make sure you look around before you purchase.
One of the best sites for digital scrapbooking beginners is http://www.digitalscrapbookplace.com/
They have great freebies to give away, as well as tutorials, tips, and reviews.
Check them out before you go anywhere else for your digital needs.
Digital scrapping is a great way to keep yourself organized and once you get the hang of it, it's faster than traditional scrapbooking.
If you still like the look of layered scrapbook pages, you can start slow, and add a few digital elements to your page to create a mix between digital and traditional methods.
The thing to rememeber is that there are no rules.
Make sure that you're still enjoying yourself, whichever method you favour. This is still your hobby so make it fun.
Tuesday, March 21, 2006
Scrapbook Kaleidoscopes
Scrapbook Kaleidoscopes are a great way to add interest and creativity to a page layout.
Such a unique look can be completed using any picture with a single, predominant subject.
It can either be created as the focal point of the page, or as a beautiful, intricate embellishment.
It's easiest to get a pattern for photo kaleidoscopes, before you begin, to learn proper placement.
Depending on the look you want, you will have to determine how many 'spokes' you want on your kaleidoscope wheel. This will in turn, determine how many copies of the picture you need to make.
Another thing to keep in mind are the edges that you cut. You must be very precise to ensure that the photos line up, without gaps.
There is a simple solution, if you're willing to wait a while for your kaleidoscope.
If you visit http://www.lotusflowerimaging.com/kaleidoscopes.htm
and send them your pictures, they will make the kaleidoscope for you, complete with special effects.
There is also software that you can purchase for your computer that will complete the kaleidoscope for you. This way, you can easily make small embellishments, without all the time and effort. Visit http://www.scrampingcentral.com/product-review/july2005-Kreative%20Kaleidoscopes/kreative-kaleidoscopes-scrapooking.html for more details.
Saturday, March 18, 2006
Tip # 22
I love ribbons.
They are my favourite new toy to play with when designing my scrapbook pages.
Got a blank spot?
Attach a ribbon with a brad or a staple.
Need a border quick?
Glue a ribbon down flat across one side of your page.
They're so easy to use and are often exactly what the page was lacking.
My favourite new tip is to use your printer to print words on your ribbon.
Personalized ribbons. What a great idea, right?
The best part is that it's SIMPLE.
Step 1: Simply type whatever you'd like to appear on your ribbon in a basic Word, Works, or Appleworks program and save it. Keep in mind the width and colour of your ribbon while you're typing.
Step 2: Print the file and make sure the words will fit nicely on your ribbon.
Step 3: Tape your ribbon directly over the printed words, with the side of the ribbon you'd like embellished facing up. Make sure that you place the tape only on the sides of the ribbon, so that it doesn't get in the way of the printing process.
Step 4: Hit print again, running the same piece of paper through the printer, and voila, your own, personalized scrapbook embellishment.
Friday, March 17, 2006
Cardstock 101
Cardstock is a staple to most scrapbookers.
A heavy-weight paper that can be used to mat photos or create embellishments, cardstock is perfect for those jobs that need to be sturdy.
Most often used in card-making, because of it's strength, cardtsock is a terrific medium to work with.
It is easy to bend, fold, curl, or cut cardstock without worrying about tearing or damaging the paper.
Simply tearing cardstock is an excellent way to showcase the strength and versatility of this paper.
Tearing cardstock is also a great framing technique as torn cardstock is the same colour, top and bottom, and will not leave you with a white edge, as patterned paper will.
These exposed raw edges can be chalked or antiquated, using distressed ink to accentuate the roughness and dimension.
Cardstock is also a perfect medium for stamping, painting, or embossing, as the density of the paper stops warping.
These are simple and fun ways to make your own patterns on plain cardstock.
Cardstock can be bought in a variety of sizes, but only comes in solid colours, there are no patterns available.
While there are no patterns available in cardstock weight paper, there are a wide variety of colours. Finding a cardstock colour to coordinate with any patterned paper you may be using is quite easy.
The combination of heavy and light weight paper make the finished layout a thing of beauty.
Thursday, March 16, 2006
Adding Texture With Acrylic Paint
I'm a big fan of dimension.
If page layouts are layered, they look so much fuller.
Somehow, the layers make the pages pop.
Acrylic paint is a great way to add dimension to your pages without taking up your precious time and money.
Some simple tips:
• A simple swipe across a page with a foam brush provides you with a great spot for journaling.
• Use acrylic paint and foam stamps to make your background more interesting (you ccan even stamp right over top of your pictures, they're safe).
• Paint freehand on backgrounds, embellishments, or photo mats to create a more unique design.
However you decide to apply acrylic paint, the finished product will be sure to impress.
Acrylic paint can be found at craft stores, scrapbooking stores, and even sometimes dollar stores. It costs as little as $0.99 and will last for years, if properly stored.
The best part is that once you have some you'll be so impressed you'll want to use it in all of your crafts.
Happy painting!
Wednesday, March 15, 2006
Get Creative With Photo Corners
Scrapbooking has long since evolved above and beyond the days of adhering photos to black paper with black photo corners and a few words written in gold or silver gel pens.
There are so many new options in the world of scrapbooking, that page layouts are fast evolving into an artform.
The more creative the better.
So why would I suggest a return to photo corners??
Well, like scrapbooking, photo corners have come along way.
You can now buy different colours of the classic photo corners, as well as corner stickers with all kinds of designs and textures to use in place of the classic, somewhat dated, black photo corners.
Not only are there lots of options on the market, there are plenty of ways to make your own unique corner embellishments.
• cut some of your own paper into even triangles to use as corners (extra tip: tearing the longest edge of the triangle gives a little extra dimension to your corners)
• embellish corners with die-cut shapes or punches
• stamp directly onto the corners of your photos (extra tip: add embossing powder for a really dramatic look)
• embellish those basic black photo corners you have on hand with stamps, punches, gel pens, or embossing ink
• use the corners to do one word journaling (use gel pens or computer software to do the writing)
• use brads, buttons, or eyelets as photo corners
The possibilities really are endless. Why not explore a few options and see how you can add colour and dimension to your scrapbook pages by simply expanding upon an old favourite?
Note: If you click on this article's title, you will be taken to an Adobe document that explains how to create digital photo corners. This allows you to design photo corners that will perfectly match your page layout, be it digital or otherwise.
Monday, March 13, 2006
The Wonders of Distressing Ink
Distressing ink is a wonderful tool to add character and depth to your page layouts.
Great for old time photos or collage pages, this technique accentuates layered pages, giving your layouts a much more dimensional appearance, with hardly any work.
The new distressing inks are so easy to use, you don't even need an applicator. Simply turn the ink pad upside down and blot it on any element you choose.
Use it on:
• the edges of pages
• each different layer of a tag or embellishment
• edges of photos
• your entire layout for an all over antique look
If you're looking for a stronger technique than just blotting, try incorporating other elements.
• stamp designs onto your background or directly onto your photos
• ink over a strip of mesh, then peal off for a unique grid design
• crumple a pice of paper into a ball (careful not to rip it) and then roll the ball over the ink pad pressing gently (the finished, uncrumpled product will have jagged ink lines crisscrossing it's surface).
If any one of these method appeals to you, make sure you encorporate this great tool into your scrapbooking repertoire. You'll love what distressing ink can do for your layouts.
Sunday, March 12, 2006
Fun With Beads
The greatest thing about beads is that you can use them on anything.
They go with any layout, and depending on the colours, size, and shape of the beads, they can help you set the perfect mood for your scrapbook page.
Simply string a few beads and attach them to journaling blocks, dangle them from pictures, sew them on a photo mat, or sprinkle them randomly as quick embellishments.
The most important part is proper fastening. Make sure those beads are secure!!
Nobody likes to pick up a scrapbook and have a shower of tiny beads hit their feet.
"No, it's not a big deal, I promise."
Very uncomfortable.
To avoid that, make sure they're firmly fastened with a very durable adhesive, string, or wire, before you hand your scrapbook over to admirers.
A great tip to save money on beads is to raid your drawers before you go shopping.
No, don't unstring your grandmother's pearls, but try to incorporate that bracelet that roke ten years ago that you swore you'd fix.
Why not forget about the hassle (were you really going to fix it anyway?) and add a piece of you to your layouts.
If the forgotten jewelery had some memories attached to it, even better! Add the memories to your journaling. Make a note of how your life has changed since then or where you found it.
Beads are a great way to add dimension, character, and colour to your layouts.
Experiment with a few techniques and let beads be the next embellishment to adorn your scrapbook.
Friday, March 10, 2006
Combining Hobbies
I have to admit, scrapbooking is my main hobby.
I love to scrapbook; could spend all day with photos, papers, scissors, and the rest of my amazing scrapbooking supplies.
I'd spread out all over the kitchen table and spill out onto coffee tables, computer desks, and any flat surface that could be quickly adapted into scrapbooking space.
But, even though my scrapping addiction...er, hobby is one of my favourite past-times, I do have other interests.
Most of my interests are reflected in my photos: baseball, hiking, my puppy, my husband, skiing, friends, family, the list goes on and on.
The best part of scrapbooking is the lack of boundaries.
Why not encorporate all of my hobbies into my layouts? I can add them to any page and fire up my brain's creativity.
Some ideas of hobbies you can incorporate into your scrapbooks are:
• painting - everything from small elements to entire pages can be created with a few artistic brush strokes
• origami - a delicate folded flower or animal is a great embellishment for scrapbooks and if you have paper, you all ready have everything you need
• quilting - from intricate paper pieced projects to quilted flowers or titles, stitching is a great way to add character to a page (it's also a very simple and decorative way to attach elements)
• decoupage - you can use decoupage to attach delicate items like dried flowers or use it as a quick way to add a little extra shine to an element.
• calligraphy - journaling, titles, embellishments, etc.
• interior design - use your hobby for colour or textural inspiration on your layouts
• music - encorporate song lyrics into your journaling
Whatever your hobby, embrace it!
Scrapbooking has no borders, no boundaries, and no rules.
Experiment, create, and enjoy.
Thursday, March 09, 2006
Tip # 46
The best part of scrapbooking is getting together with others.
Scrap-gatherings you could call them.
Take some friends and go to a scrapbooking store with a workshop, have a weekly get-together with friends and neighbours who share your passion, or if you can, start a scrapbooking club in your community.
You would be surprised at how many people will jump at the chance to share memories, stories, and techniques.
Not only is it fun to get together with the girls, it's a great way to gain inspiration and creativity and share your tips and techniques with others.
Scrap Away!
Quick Note: By clicking on the article title, you will be forwarded to a page that describes how to start your own scrapbooking club.
Fun With Heat Embossing
While regular embossing is a great way to add dimension and texture to a page, heat embossing is a little twist that's just plain fun.
You can take a pretty element from your page and make it look professional with a few sprinkles of embossing powder and a blast from a heating element.
Heat embossing can be used with stamps, embossing pens, or just sprinkled randomly to ahieve a great 3-D, liquidy finish.
The best part is that it's easy.
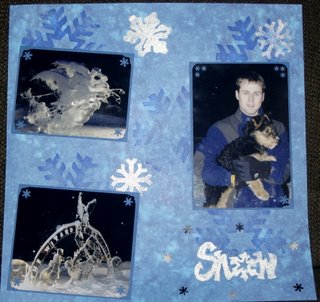
In this layout, the white snowflakes and the title were heat embossed using stamps.
To copy this technique, simply ink your stamp with embossing ink (any inkpad that stays moist and doesn't dry immediately will work), stamp your page, and then dust embossing powder over the image. Shake off any excess powder (it can be reused, so don't toss the remnants), and then heat it with an embossing tool for a few seconds.
Simple, right!?
The best part is if you make mistakes, you can just use an embossing pen to fill in the bare areas and repeat the process all over again (I learned that trick from a fellow scrapbooker and instructor).
If you use the pens to begin with, you can emboss your own designs, or use it to make your handwritten titles pop.
This way you don't have to worry about always having the perfect stamp on hand.
To decorate background pages you can sprinkle embossing powder freehand and then heat it.
Tip: This is definitely the least controllable method. Keep in mind that whatever powder is on the page will melt and become a permanent part of your layout.
This works great to make snowy backgrounds or to create rain or splashes.
Play with the colour of ink you use, as well as the type of embossing powder. There are so many great ways to use heat embossing on your page layouts, accents, greeting cards, bookmarks, etc.
You can create all kinds of 3-D images with these techniques. Like all crafting techniques, play with it until you find the method that works best for you. Explore these and other techniques until you get the exact look you want.
Happy Embossing!!
Wednesday, March 08, 2006
Dry Embossing 101
Dry embossing is a great way to add texture and dimension to your scrapbooks.
Frame photos, make an instant border, or use individually embossed elements as embellishments to add charisma to your pages.
However you choose to use the technique, the outcome is fantastic.
To step up your basic embossing, try to make each page your own by adding a little extra to your embossed images.
My favourite 'extras' are sanding and chalking.
These techniques are fast, easy, and inexpensive, but they take a so-so layout and make it perfect.
Sanding is quite simple. All you need is an embossed image and a small piece of fine grade sand paper.
Lightly rub the sand paper over the embossed image, being careful not to tear the paper. This will give the image a rough, grainy look and a nice, white outline.
Tip: If you are using cardstock, you won't see white, but the edges will still look rough and texturized.
To chalk the images, simply rub chalk onto the raised part of the image with an applicator (a cotton swab or a makeup sponge work well) until you've achieved the desired look, and gently shake off extra chalk dust.
Tip: Chalk erasers are a great tool for scrapbookers. Any mistakes you make while chalking can quickly be righted with this handy invention
You decide how you want it to look by choosing the chalk colour and how much you apply. You can trace the inside of the emossed design or you can chalk the whole image.
Tip: Feel free to use different colours on the same design (ie. a flower in a pot: use different colours of chalk to make the flower pink, the stem green, and the pot a terra cotta orange).
In this picture, I chalked the designs with black chalk, shading the whole element in, and then rubbed sandpaper lightly over top, to help the designs stand out.
Both of these techniques call attention to embossed elements which could otherwise go unnoticed.
For more great tips and how-tos, click on the article title. You will be directed to a great dry embossing site with information on how to emboss, what you need to get started, and great ideas to keep your creative juices flowing.
Frame photos, make an instant border, or use individually embossed elements as embellishments to add charisma to your pages.
However you choose to use the technique, the outcome is fantastic.
To step up your basic embossing, try to make each page your own by adding a little extra to your embossed images.
My favourite 'extras' are sanding and chalking.
These techniques are fast, easy, and inexpensive, but they take a so-so layout and make it perfect.
Sanding is quite simple. All you need is an embossed image and a small piece of fine grade sand paper.
Lightly rub the sand paper over the embossed image, being careful not to tear the paper. This will give the image a rough, grainy look and a nice, white outline.
Tip: If you are using cardstock, you won't see white, but the edges will still look rough and texturized.
To chalk the images, simply rub chalk onto the raised part of the image with an applicator (a cotton swab or a makeup sponge work well) until you've achieved the desired look, and gently shake off extra chalk dust.
Tip: Chalk erasers are a great tool for scrapbookers. Any mistakes you make while chalking can quickly be righted with this handy invention
You decide how you want it to look by choosing the chalk colour and how much you apply. You can trace the inside of the emossed design or you can chalk the whole image.
Tip: Feel free to use different colours on the same design (ie. a flower in a pot: use different colours of chalk to make the flower pink, the stem green, and the pot a terra cotta orange).
In this picture, I chalked the designs with black chalk, shading the whole element in, and then rubbed sandpaper lightly over top, to help the designs stand out.

Both of these techniques call attention to embossed elements which could otherwise go unnoticed.
For more great tips and how-tos, click on the article title. You will be directed to a great dry embossing site with information on how to emboss, what you need to get started, and great ideas to keep your creative juices flowing.
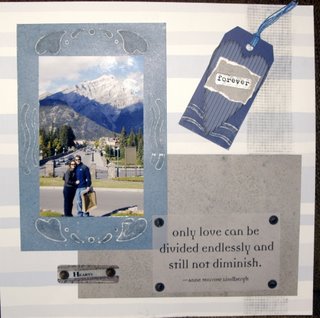
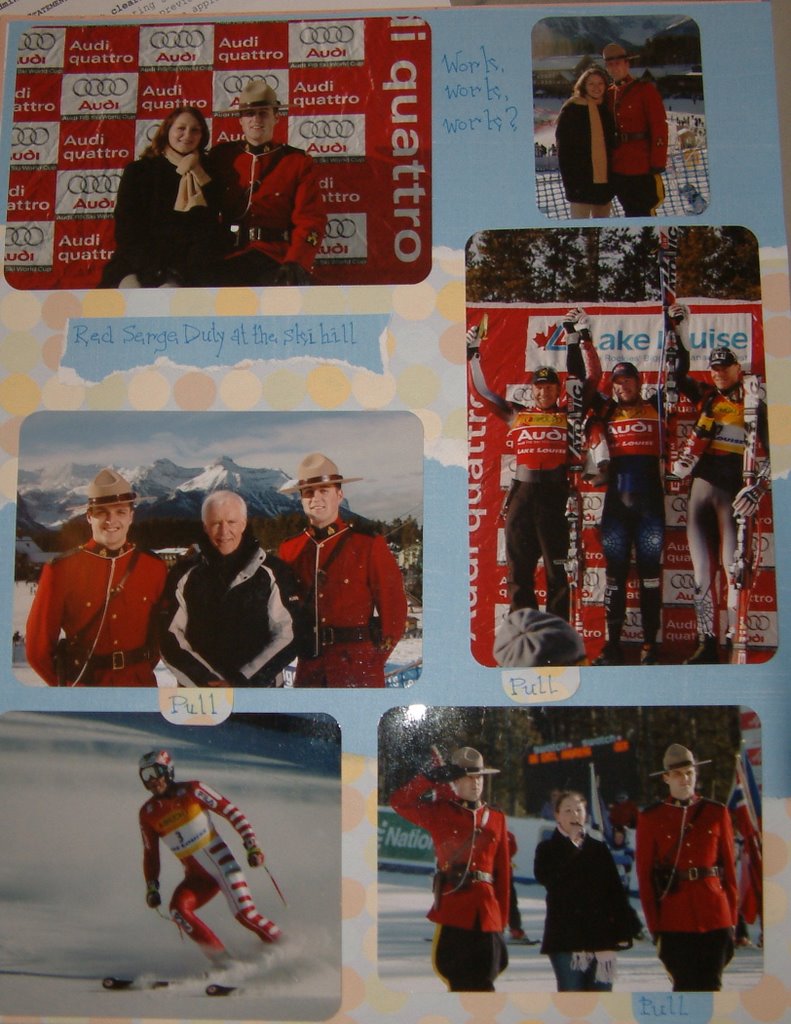
Tuesday, March 07, 2006
Sneaky Journaling Tips
Journaling is usually the last thing scrapbooker's think about when they're creating their layouts.
When all the pictures are in place and the layout is nearly complete, they think, now where can I add a few words about these pictures??
Well, even if this sounds all to familiar, there are a few tricks to sneak your thoughts onto a page full of pictures.
One of my favourite tricks is to slide your journaling behind photos, leaving a small 'pull tab' revealed.
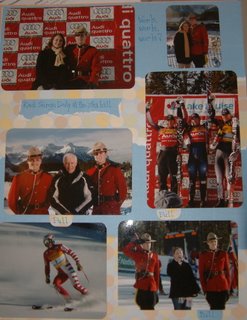
It's a little hard to see in this picture, but there are three pull tabs on this layout. They slide in easily behind photos and create journaling space where there was previously no room.
This way, you can still squeeze all of those pictures in and write a few words about each one.
One of the greatest benefits about this method is that you can direct your journaling to a specific picture.
You can relay how each face your dog makes reveals his different moods or you can link every different feature on your baby to a family member.
Another tip is to hide a journaling block behind a photo that is fastened with hinges, so you can lift it up to reveal what you've written.
This is a good way to incorporate a lot of journaling into your layout.
Also, if your journaling is sentimental, this is a good way to ensure that not everyone who flips through your scrapbook will read it. People will only see it if they choose to lift the picture.
Try adding an accordion-style journaling book to your layouts.
This way, you can have unlimited journaling, and still have room for other elements.
It also adds dimension and character to your layout.
There's always room to add a bit of journaling.
Every page can accommodate a few written words, and they help keep your memories fresh in your mind, no matter how long it's been.
When all the pictures are in place and the layout is nearly complete, they think, now where can I add a few words about these pictures??
Well, even if this sounds all to familiar, there are a few tricks to sneak your thoughts onto a page full of pictures.
One of my favourite tricks is to slide your journaling behind photos, leaving a small 'pull tab' revealed.
It's a little hard to see in this picture, but there are three pull tabs on this layout. They slide in easily behind photos and create journaling space where there was previously no room.
This way, you can still squeeze all of those pictures in and write a few words about each one.
One of the greatest benefits about this method is that you can direct your journaling to a specific picture.
You can relay how each face your dog makes reveals his different moods or you can link every different feature on your baby to a family member.
Another tip is to hide a journaling block behind a photo that is fastened with hinges, so you can lift it up to reveal what you've written.
This is a good way to incorporate a lot of journaling into your layout.
Also, if your journaling is sentimental, this is a good way to ensure that not everyone who flips through your scrapbook will read it. People will only see it if they choose to lift the picture.
Try adding an accordion-style journaling book to your layouts.
This way, you can have unlimited journaling, and still have room for other elements.
It also adds dimension and character to your layout.
There's always room to add a bit of journaling.
Every page can accommodate a few written words, and they help keep your memories fresh in your mind, no matter how long it's been.
Monday, March 06, 2006
Tip # 54
Scrapbooking is a great way to be creative with your memories.
Don't let it stop at embellishments. Make sure your photos are changing as well.
• change the sizes of your photos
• make some black and white
• use a coloured filter
• print some matte and some glossy
• print a black and white photo on coloured paper for a retro look
Whatever you can do to make each page look unique, do it. That's what scrapbooking is all about.
Creativity.
Sunday, March 05, 2006
Scrapbooker's Block
Just like writer's block, scrapbookers can sometimes feel as though they've hit a creativity wall.
Your pages start to look alike: two pictures, a journaling block, and an embellishment.
You use the same old colours because your pictures are of the same old things.
You sit down and flip through photos and can't muster the want to start a new page layout.
Happens to the best of us.
One of my best tips is to look for creativity in others.
Use your peers!
Why not?
There are so many websites, magazines, books, web logs, and stores that feature unique and beautiful layouts as well as tips and techniques to get you back on your feet again.
You won't be able to tear yourself away.
If you don't feel you have the time to flip through pages or wander through stores (really???), arrange a scrapbooking day with fellow scrappers.
Have your friends look at your pages and see what they think.
There are so many different techniques and mediums out there, you're bound to be able to swap ideas and gain a fresh perspective.
Plus, it's fun!
If all else fails and you have a few minutes but just feel like the creativity isn't flowing, don't waste a second of it.
Surely, you can still do something.
Not everything about scrapbooking has to be creative 100 per cent of the time.
Gather the photos you have and start cropping.
Find papers or quotes to match your photographs.
Do a quick inventory of all your supplies. You may find a tool you had long forgotten or a specific embellishment that would be perfect for an upcoming project.
Whatever you do, don't give in.
Staring at a blank canvas is definitely not going to inspire you, but these tips just might.
Scrapbooking Hardware
It's amazing where you can find things for your scrapbooks.
There are the usual hot spots. Haunts where you'll find bug-eyed scrappers drooling over a new line of stickers or ogling the newest die-cuts.
Craft stores, scrapbooking stores, paper supply stores: these are the usual stops on a scrapbooker's checklist.
But there are a few options you may be missing out on.
Take your local hardware store for example.
Power tools, lawn fertilizer, and dusty appliances....
Doubting me are you?
Well, it's time to reevaluate those aisles you pass by without a second glance.
There are so many great things hiding in hardware stores.
Surprised?
Use your creativity and take a second look at some of the things you pass by:
• house numbers can be used as hanging elements (they're great for birthday pages and can give a layout a manly feel)
• hinges can be used to fasten pictures, journaling blocks, or flat elements to your page (they're great for making "shutters" which open to reveal a photo or journaling)
• drywall tape is a great way to create lines and give dimension to your page layout (try laying the tape down on a page, applying chalking over top, and then removing the tape for a unique grid pattern)
Not only can you use hardware store finds for embellishment, you can also find some great tools that are perfect for scrapbooking.
• paint brushes
• sponges
• sand paper (use it to give your paper a rough, worn in look)
• stencils
There are so many great finds for scrapbookers everywhere you look, if you just keep your eyes open.
See what you can find.
Happy hunting!
Friday, March 03, 2006
Chalk it up!
There are so many uses for simple childhood tools in scrapbooking. It really is a chance to escape to childhood days of cut and paste.
Chalk is one of the best tools to take with you out of your childhood, and into your scrapbooking supplies.
Cheap, colourful, and malleable, chalk can be used in any number of ways to spice up your layouts.
If your pages are starting to look a little bland, chalk is a great way to make elements stand out.
It's easy to over-coordinate your papers so that elements blend into your page layouts: chalk is the key to achieving seperation.
• Rub some chalk around the edges of smaller elements or the letters in your titles to help them stand out on busy backgrounds.
You can also use chalk to create beautiful, unique page accents.
• By grinding chalk into fine dust and sprinkling it onto a page, you can create a one of a kind splatter design.
This works good for painting pictures or pictures of messy kids, pets, etc.)
• For a great watercolour look, use a soft sponge ( a makeup sponge works great) to blend the spots together.
This look is perfect for sunrise or sunset pictures.
However you choose to use it, chalk is a great addition to every scrapbooker's toolbox.
Thursday, March 02, 2006
Tip # 13
If you have a lot of photos with a lot of background, and a very small subject, use a jumbo square punch to crop the photo down to size.
This saves the hassle of trimming photos with scissors and is an easy way to keep secondary photos the same size (primary photos are the main photo on a layout, secondary are the so-so pics).
These photos can be used together in a photo montage or border or separately to decorate a tag.
This saves the hassle of trimming photos with scissors and is an easy way to keep secondary photos the same size (primary photos are the main photo on a layout, secondary are the so-so pics).
These photos can be used together in a photo montage or border or separately to decorate a tag.
Wednesday, March 01, 2006
Colour themes
We've covered making your photos pop using colours picked from pictures, now we're going to talk about how to link them into a theme.
Most layouts need a strict colour theme to achieve unity and balance.
Without themes, pages look cluttered and seem to have random, mismatched elements.
Basic themes are pastels, primary colours, jewel tones, or monochromatic colours.
By keeping all of the colours you use on each page within the boundaries of one of the above themes, you will be able to mix and match without worry.
Another fail safe idea is to mix in black, grey, or white. These colours can be used along with any of the aforementioned themes with good results. Just make sure that it gives you the look you want.
For more theme ideas, look around you.
Check out packaging in the grocery store. What colours do they use together? Do you like the results?
What colours are 'in' this year? If there's a new mix that you like, test it out on a layout.
Just keep in mind that these are keepsakes that you'll want to keep around for years. If purple and yellow are in this season, and you're not sure if you'll like it next year, hold off.
We take a lot of nature pictures, so most of my pages use blues, browns, and greens.
Play until you find a few themes that you really like, or that go with the colours in most of your pictures.
There are so many colours out there to experiment with, just have fun with it.
Choosing Colours
Choosing colours to use with photos can be tricky.
Some people find it hard to trust their intincts and go with the colours they first think of when looking at a picture.
Ideally, you should learn to trust your gut.
If a purple jacket pops out at you from a picture, frame it with the same shade of purple. It will draw your eye to the picture.
Likewise, if you want a certain element to stand out, you can use this technique to achieve just that.
Think your baby has beautiful blue eyes? Choose a frame or background paper that picks up that blue, and others will notice.
Using colours that intensify your pictures will only make our scrapbooks more eye-catching and keep the focus from straying to elements as opposed to the moments you want to remember.
If you're not sure your instincts are guiding you in the right direction, or if you just need a quick lesson in colour, click the "Choosing Colours" title. It will link you to a page on design arts, complete with colour wheel, so you can learn to choose colours that will work for your pictures.
Better Backgrounds
One of the most often overlooked element of a scrapbook page is the background.
Most people set one piece of paper as their background and start adding elements, without spending anytime on the backdrop for their whole page.
Spend a little time on your backgrounds every once in a while to keep your pages looking fresh and to keep your scrapbook more interesting.
Here are a few ideas to try:
Tear a sheet of paper ( or use a skinny scrap) to use as a border along one edge of your background paper. (top, bottom, left, or right, use them all).
Sew a bunch of jagged scraps together for a pieced look.
Place a slightly smaller paper over top of your background page to create a thin border around your layout. Bonus Tip: Tear the smaller paper's edges for dimensional impact.
Overlap scraps to create a collage look. Bonus Tip: Make sure the patterns aren't all really busy. One dominant pattern is perfect.
Make sure you try to always bring new elements to each of your layouts. It will keep people turning the pages and wanting to see more.
Tuesday, February 28, 2006
Big elements
Sometimes the best things in life are BIG!
Instead of using a few smaller embellishments on each page layout, mix it up with one, solitary element.
Use the new big brads or one big flower on your pages. Have an oversized tag on your page for journaling or to decorate as an embellishment.
Not only embellishments look good big. Have one big, central photo on your page or use big letters for your titles.
You're probably thinking, if everything is bigger, my scrapbook will have to be bigger, too.
Not so.
You really only want one or two big elements on your page.
Make a few letters of your title larger than the others.
Have one large brad on your page and if you need more, use a few smaller ones.
Have one large element on your oversized tags.
Too many big elements make your pages look cluttered and messy.
Keep it simple, but feel free to play with it.
Tuesday, February 21, 2006
Tip # 99
Dried flowers are very delicate.
When using dried flowers on a page layout, make sure to adhere it firmly to the page, with adhesive behind every inch of the flower. If not, it will crumble and your page will have to be repaired.
Mod Podge is a good way to adhere flowers and keep them intact.
When using dried flowers on a page layout, make sure to adhere it firmly to the page, with adhesive behind every inch of the flower. If not, it will crumble and your page will have to be repaired.
Mod Podge is a good way to adhere flowers and keep them intact.
Monday, February 20, 2006
Too Many Pictures!!
My husband and I look like tourists everywhere we go.
We have a wide array of cameras (both digital and 35mm) as well as a video camera which we like to carry around on every hike we go on, every walk we take with our puppy, every event which may provide us with a few magical 'Kodak Moments' we like so much.
For those of you out there who share our love of photos and are stuck trying to play catch up all the time with your scrapbooking, have I got a deal for you.
You don't have to limit yourself and only scrapbook a few pictures, even though there are six really good pictures or lock yourself in a room with scrapbooking supplies and food for a week to try and scrapbook a single event that you went a little crazy at. Use them all on one layout.
Say what??!!
You heard me.
There are so many creative ways to use up a big group of photos and still have time left over to tackle other projects.
Try to keep a focal point on your page. This is still an important design practice.
Keep one photo slightly larger than the others to keep pages from looking cluttered. This will keep people viewing your layout from getting overloaded trying to take it all in.
Keeping that in mind, have fun with it. Here are a few techniques I like to use:
Try to 'hide' photos or journaling under another photo. Use hinges, and have the top photo open like shutters to reveal another, smaller photo underneath.
Trim secondary photos (those not as captivating as your main picture) tightly, so they are quite small. These can be used on tags or even in a photo collage.
Make your embellishments out of photos. Trim someone's funny face out of a picture and use it as the centre of a flower or cut out a few elements from photos to use as a border.
Have fun with it, but do be careful not to overdue it. Clutter is not good.
Keep the focus on your photos and your design clean.
Sunday, February 19, 2006
Sew Perfect
If you're a crafty person with multiple hobbies why not add a few of them to your scrapbooks?
Why not showcase two talents at once??
One of the greatest crafty combinations has brought together sewing and scrapbooking.
Bring a needle and thread to your layouts for a homey, well-loved look; like wrapping your memories in a beautiful, hand-made quilt.
If you're looking for something a little edgier, use zigzag stitches to hold together random strips of torn paper.
Whatever look you're going for, adding sewing to your pages is a terrific way to keep your pages unique and aesthetically pleasing.
Quick Tip: If you're scared of needles, or just lack the time and patience for needle threading, you can buy rub-on stitches, or even just use a pen to draw 'stitches'.
Saturday, February 18, 2006
Sketchy
Another way to speed up your scrapbooking is to keep sketches of your page layouts.
Often, it's hard to decide how to place photos, journaling blocks, and embellishments and you end up wasting time playing with them. If you keep sketches, you can either use or adapt an old layout in no time.
Each time you finish a layout, make a small, basic sketch of your design (3" x 3" is big enough) and add it to your collection. Simply store them in a binder or duotang so you have instant inspiration whenever you are stumped.
To further speed up the process, divide the sketches into sections based on the number of photos you use, as scrap maps did with their website, http://www.scrap-maps.com/
Have a section for one picture layouts, two picture layouts, three picture layouts, and many picture layouts. When you're looking for inspiration, you can thumb through the appropriate section and find a layout fast.
You can also adapt and expand upon this idea to include sketches of cards, calendars, or embellishments.
Friday, February 17, 2006
Cute as a Button
Buttons are an inexpensive scrapbooking element that can add so much to a page design.
· Use buttons to ‘hang’ elements on
· Scatter buttons randomly along one edge of a page for a great 3-D border
· Place buttons all around a photo or a journaling block to make a photo frame
· Use those old brown and beige buttons that you can never find a use for to make ‘sand’ at the bottom of a beach page
Don’t limit yourself to the buttons on your husband’s work shirts, feel free to experiment with specialty buttons as well.
You’d be surprised what you can find in your local craft store. They have buttons shaped like everything from flowers to army helmets to letters so you can use them on any kind of layout.
Whether sewn in place or simply fastened with an adhesive, buttons can make your pages pop.
You’ll love ‘em!
Tag, You're it!!
Tags are such a great addition to any layout (and are another way to use up scraps).
Use tags of all shapes and sizes to add interest to your pages.
Use them as a photo mat for a picture
Add journaling to your page by writing on a tag
Write your page title on a tag
Use them as an embellishment (decorate them with letters, fibres, punched out shapes, buttons, bottle caps, or anything else you can find)
Tags are also a great way to add depth. You can loop ribbons or fibres through the hole at the top to make your tag stand out.
Also, if you're like me and have a lot of pre-cut tags laying around, use them to make quick gifts.
A tag book is a great gift that you can make in no time. Link a few tags together with ribbon to make a mini scrapbook. Your friends will love it.
Keep brag pictures handy with a 'keychain keepsake'. Decorate a tag with your favourite picture and then laminate the finished project. Punch a hole in the tag and you're ready to go.
Tags are such a great way to add a little extra to your pages.
For free tag downloads, click on the title and you'll be forwarded to a site that lets you download free tags that are all ready decorated for you and ready to use.
Thursday, February 16, 2006
Time Saving Tips
Scrapbookers are always looking for more time.
A few extra minutes to finish a project.
An evening to learn a new technique, or take a class.
A weekend with nothing planned, where you could really attack the ever-growing pile of pictures on your desk.
Sometimes these moments are hard to come by. Make sure that you milk every minute of your scrapbooking time with a few of these time saving tips.
• jot down some ideas
Keep pads of paper handy and scribble down design ideas while you're on the phone or as they come to you throughout the day. You'll have a layout design ready to go the next time you sit down to scrap. Don't forget about those cute things your dog does or something your husband says that always makes you smile. Record your daily thoughts or special events in a book for quick and easy journaling.
• keep your supplies handy
Convert a spare room into a scrapbooking zone where you can keep supplies and projects readily available. This eliminates at least ten minutes of searching and gives you more time to spend with your addiction...err, hobby.
• do a few layouts using one technique
For some reason, I can't help but scrapbook in chronological order. I like to start at the top and work my way through to the bottom. However, the quickest way to get things done is to pull a few pictures out and use the same layout, or if you're using a specific technique, use it twice, apply it to both pages. This way, you're only taking the tools out once and getting twice as much done.
note: If you use scrapbooks with top-loading page protectors, you can easily shuffle pages around as you go.
Any of these ideas can keep you scrapbooking and help you avoid wasting precious time with preparation or the oh-so-common scrapper's block.
Once you find a way to spend more time scrapbooking and less time getting ready to scrapbook, you'll enjoy your hobby even more.
Wednesday, February 15, 2006
Precious Scraps
While most scrapbookers keep a trash can handy to rid themselves of dreaded scraps, the most savvy scrapbookers sweep them into an envelope for future use.
One person's garbage is another's treasure, right? Well, after you see all of the uses for those scraps you carelessly toss, you'll be elbow deep in your trash can, looking for yesterday's toss-aways.
Use scrap paper for any kind of small project you have on the go.
Sounds so simple.
Take a minute to think of how great that really is. Use up all of those scraps you would normally toss, and save that great 12 x 12 page you were only going to use 3 inches of.
Well, that's fine, but what if you don't do 'small' scrapbooks?
No worries!
Use your scraps to make greeting cards (just think of all the paper you could have used on Valentines).
Decorate tags with small pieces to accentuate your layout or use them to punch out designs or make an original embellishment.
Use tall, skinny scraps for borders.
Let your kids use the scraps to make their own scrapbooks.
Use your tiniest scraps to make your own paper.
The possibilities really are endless.
Now, if you're eyeing your garbage can, thinking, "I bet those scraps are still in good shape," it's not worth it.
If you're a scrapbooker, I guarantee there will be more.
Start tomorrow.
Saturday, February 11, 2006
Tie One On
My favourite scrapbooking element of the moment is ribbons.
They are so fun to play with and add dimension and character to page layouts.
The best part??
They're dirt cheap, if you even pay for them.
Now, in saying that, I'm not promoting shoplifting. I'm not saying, "it's small, so pocket it." There are just lots of great places to find ribbon out there that you may not think to look.
Ribbons can be found at garage sales, sale bins at craft stores, or even in your own basement (remember what you used to tie in your hair?? Bet you still have some).
Tie a few on to a page to see how they can balance elements or bring focus to a picture. A few ribbons held in place by a brad or a staple or even sewn in place can make your pages so much fuller.
You can also use ribbons to 'hang' photos on your pages. Try using ribbons as ready-to-use borders, or add ribbons to a tag.
Play with it.
Tie one on.
Thursday, February 09, 2006
Workshops
I've been a scrapbooker for many years and have heard rumours about the backrooms of some scrapbooking stores.
I'd heard they had tons of workspace and tools that you could use. Sounds like fun.
Now, as a rural person, I never lived close enough to a scrapbooking store to venture into one of these rooms, but the other day, with a bit of time to kill, I thought, "what the heck, let's see what all the fuss is about."
My first time was in the Scrapbooker's Paradise in South Calgary.
I will never be the same again.
I ventured into the elusive backroom only to find it wasn't as elusive as I'd thought.
Not only were there people in there from every age group, but every skill level as well. All these years I'd thought it was a place for the elite. The Olympians of all scrapbookers.
I was welcomed with open arms and thousands of the coolest tools that I've always wanted to learn to use.
My mind started racing.
How could I possibly make the best use of my time?? How much time could I possibly spend in here and still get all my errands done??
Walls of punches of all shapes and sizes, die-cut machines with thousands of different templates, inspiring layouts hanging on the walls....
My heart was pounding.
I was mentally erasing errands off my list.
All of the possibilities were flashing before my eyes.
I grabbed my bag of paper and started punching.
Two and a half hours later with a rumbling tummy (I had long ago missed lunch) and a new bag of goodies clenched tightly in my aching fingers, I reluctantly left the workshop.
With BIG plans to return.
Since I've returned home, which is about two hours away from my newfound scrapbooking heaven, I'm preparing myself mentally for the next opportunity to run that die-cutting machine over fresh scrapbooking paper.
I will be better prepared next time.
I will pack ample food and water to keep my energized and hydrated.
I will bring a variety of papers and a thousand pieces of napkins with my ideas sketched on them.
I will tell all of my friends of the joys and excitement that lays behind those back walls.
I will return to my newfound heaven.
And I will be ready.
Wired
Wire is a very versatile element that can be added to any page.
Most craft stores carry a variety of coloured wires of all thicknesses, but ordinary wire you find laying around the house works as well (just make sure it’s not hooked up to something).
Whatever wire you use, be aware of sharp, jagged edges. They can damage photos or puncture holes in your page protectors, if they’re not filed down properly.
Wire is so easy to manipulate you’ll literally find hundreds of uses.
Here are a few:
• Run a piece of wire through a paper crimper for a new, wavy look (place the wire between two pieces of paper to protect your crimper).
• Fold it into any number of designs: flowers, leaves, curly-cues, any simple shape that would add to your layout is at your fingertips when you have wire on hand.
• Use wire to make a page title. It’s remarkably easy to turn wire into beautiful cursive.
• ‘Hang’ elements using wire.
• String beads on wire to make a 3-D border for photos or entire layouts.
Remember, any time an article interests you, click on the title (in this case, wired) to be sent to a page with further information, related articles, or great free stuff!
The Beauty of Vellum
Vellum is a great addition to every scrapbook.
There are hundreds of techniques that you can use to incorporate this versatile paper into
your layouts, the following are just a few ideas to help get you started:
• A simple square of vellum overlay can ‘quieten’ a loud or busy pattern.
• Journaling on vellum can add texture and a subtle layering effect to layouts (make sure you give the ink ample time to dry).
• A piece of vellum placed over the background of a photo can help focus attention on the subject.
• Torn vellum is a good way to add dimension to your page, without adding bulk.
• Crumple a bit of vellum and then flatten it with an iron (carefully) or press it in a book. This gives the vellum a unique crackle finish.
However you use it, you'll love the finished product. Vellum is a simple way to step up your scrapbooks.
Saturday, February 04, 2006
Seeing in Black and White
Black and white photos are classic.
Timeless.
Elegant.
Wedding photos, anniversary's, babies, kids playing in the park, dogs chasing a stick, all of these events can be captured in black and white.
Even if you don't take the photos in black and white, they can easily be altered. Using a basic photo program on your computer or even the machines at Wal-Mart, you can create black and whites out of any photo.
The best part of black and white photography is never having to wonder if the blue paper you chose really matches the blue in the photos.
Those days are over!!!
Once you've mastered basic black and white, try adding filters such as sepia, which gives photos an antiquated look.
Your Photos in the Spotlight
The best way to call attention to you photographic prowess is to make sure that your best photo is in the spotlight.
An easy way to make this happen is to save the most room for your favourite shot.
Having one photo on a layout that's bigger than all the others automatically draws your eye. This helps break up the monotony of 4x6 photos and keeps your layouts looking unique.
This doesn't mean you have to blow-up huge replicas of your photos (you can, but it can get expensive). To achieve this look, you can crop some of the other photos in your layout to keep the focus on your favourite.
One large photo can be balanced by a few smaller pictures on the same layout.
Also, change it up sometimes. If you always use three photos per page, shake it up a bit. Try a page with only one photo, or use five or six smaller photos (remember to still have one photo slightly larger than the others).
Another quick fix is using photo mats or embellishments to draw your eye.
Using a different paper to mat your favourite snapshot can draw your eye as well or you can use the same paper, but tear the edges or crimp it.
Simple embellishments, such as fibres or embossing, can add a great deal to a layout and set apart a special picture.
However you decide to do it, highlighting one picture per layout will focus the eye and keep your layouts fresh.
Thursday, February 02, 2006
Inspiration
Inspiration is one of the hardest parts of scrapbooking. Usually, scrapbooking is done in the few spare minutes you set aside for yourself in the evening, or those two spare minutes at lunch. Whenever you have the chance to sit down, you open up your box of photos and think, "where do I start?"
How can you expect yourself to have those creative juices flowing at all times? It starts to feel intimidating; whenever you get a moment to scrapbook, it seems like you get scrapper's block.
I know the feeling.
Some of my tips to keep your layouts looking fresh is to check out what other scrappers are doing. Look through your friend's scrapbooks. Maybe flip through a magazine or search online.
Sometimes, the most inspiring ideas can come from seeing a new technique or element that would be perfect for one of your pages.
You can also try taking a class or attending a workshop. There are so many people out there that you can learn from, why not utilize these resources?
Check with your instructor, sometimes they let you bring some layouts in and they can give you feedback.
There are numerous sources on the internet that are great at inspiring.
One of my favourites is http://www.scrap-maps.com/
This is a great place to find layout ideas and all the sketches are free. I promise, this site will get your creative juices flowing.
Wednesday, February 01, 2006
Taking better pictures
The point of scrapbooking is to showcase your photos and put your memories in their best life. In order to do this, you need to make sure each photo you take is the best it can be.
With digital cameras you have the luxury of taking as many photos as you can, so go crazy! Use those memory cards up. It will give you more options and allow you to better capture your memories.
Some quick tips:
1. Use the rule of thirds.
Everyone has heard this, but what does it mean??
Basically, move your subject off to the side when you're looking through the viewfinder. Divide your picture into thirds, both horizontally and vertically. The main focus of your picture should be located at the points where the lines cross.
2. Frame your pictures.

This could have been just another boring ocean picture, but by allowing some natural vegetation to frame the photo, you focus the attention, and include a creative element in your photos before they even hit the scrapbook page.
3. Look at things from a different angle.


These were both taken on a sailing trip. Instead of the usual scenery pictures, a little bit of creativity captured the beauty of life on the water.
4. Take more vertical pictures.


People pictures should almost always be vertical. People naturally are taller than they are wide, so you can capture more of them with a vertical shot.
5. Use the light.


These photos both use light to accent the beauty of the moment.
The mountainscape is highlighted by the flare caused by the sun. It captures the juxtaposition between blue skies and snow-capped mountains.
The night shot of the Sydney bridge is lit up by the beautiful lights below. The reflection off the water adds colour and life to the photo.
The biggest tip is to just be creative and feel free to experiment with a few different techniques until you find the shot that captures the moment.
With digital cameras you have the luxury of taking as many photos as you can, so go crazy! Use those memory cards up. It will give you more options and allow you to better capture your memories.
Some quick tips:
1. Use the rule of thirds.

Everyone has heard this, but what does it mean??
Basically, move your subject off to the side when you're looking through the viewfinder. Divide your picture into thirds, both horizontally and vertically. The main focus of your picture should be located at the points where the lines cross.
2. Frame your pictures.

This could have been just another boring ocean picture, but by allowing some natural vegetation to frame the photo, you focus the attention, and include a creative element in your photos before they even hit the scrapbook page.
3. Look at things from a different angle.


These were both taken on a sailing trip. Instead of the usual scenery pictures, a little bit of creativity captured the beauty of life on the water.
4. Take more vertical pictures.


People pictures should almost always be vertical. People naturally are taller than they are wide, so you can capture more of them with a vertical shot.
5. Use the light.


These photos both use light to accent the beauty of the moment.
The mountainscape is highlighted by the flare caused by the sun. It captures the juxtaposition between blue skies and snow-capped mountains.
The night shot of the Sydney bridge is lit up by the beautiful lights below. The reflection off the water adds colour and life to the photo.
The biggest tip is to just be creative and feel free to experiment with a few different techniques until you find the shot that captures the moment.
Tuesday, January 31, 2006
Making Titles Stand Out
Hopefully, I have you convinced that journaling can add to a layout.
Now that you're keeping track of your memories, focus on the titles you use for each page.
Creative titles can evoke emotion and allow your creativity to shine.
Some examples of hand-made titles that I've done follow:
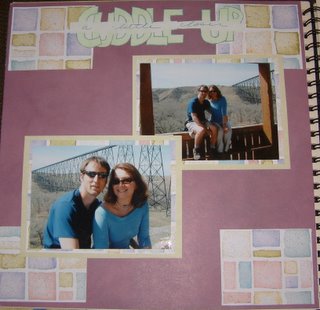
You can also purchase premade titles and page-toppers at scrapbooking or craft stores on a variety of themes or make your own using a design program on your computer.
The following titles were made on my home computer, using InDesign or Illustrator:
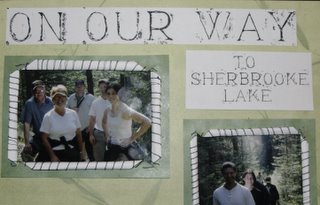
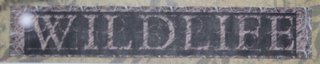
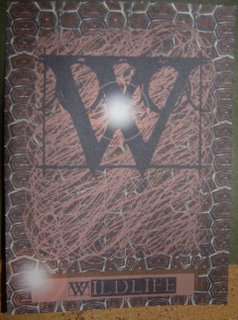
There are also programs that you can buy which have interesting fonts, banners, and clips allready designed, so you can just type your own title on a pre-made banner. This is a very handy option to save time.
One of the programs that I like is Becky Higgin's CD, Creative Clips and Fonts.
While hand-drawn titles are usually the most interesting, using computer programs or pre-made titles are speedier options for those of us with a daunting stack of photos.
Now that you're keeping track of your memories, focus on the titles you use for each page.
Creative titles can evoke emotion and allow your creativity to shine.
Some examples of hand-made titles that I've done follow:


You can also purchase premade titles and page-toppers at scrapbooking or craft stores on a variety of themes or make your own using a design program on your computer.
The following titles were made on my home computer, using InDesign or Illustrator:


There are also programs that you can buy which have interesting fonts, banners, and clips allready designed, so you can just type your own title on a pre-made banner. This is a very handy option to save time.
One of the programs that I like is Becky Higgin's CD, Creative Clips and Fonts.
While hand-drawn titles are usually the most interesting, using computer programs or pre-made titles are speedier options for those of us with a daunting stack of photos.
Monday, January 30, 2006
Creative Cropping
Cropping a photo can completely change its appeal.
While the best way to properly frame your photos is with your camera, you still have a few chances to alter a photo before you use it in your layout.
Computer editing programs such as Photoshop or iPhoto are excellent resources for editing photos. If you don't have access to these programs or are working with photos which have all ready been printed, you can also crop them with scissors or a paper cutter.
The most interesting photos have a prominent subject. In most cases, a picture taken with the subject filling the entire lens is more captivating than one with a lot of background scenery.
In this case, the close-up of the puppy is more captivating than the second photo, which includes too much background.


As you can see, cropping your photos can make a big difference.
While basic cropping is important, you can take it to the next level and heighten the appeal of your photos by being more creative.
Some quick ideas:
Divide your photo into equal parts (usually about 1" sections look best) and place them on the page, with a small gap between each section.
This technique is great for scenery pictures.
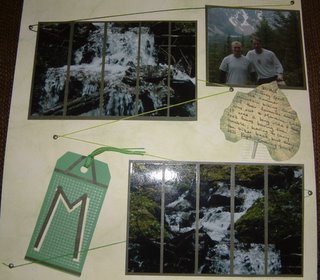
In this layout, the main photo is cropped using a similar method, but the focus is placed on the people in the corner, by leaving that section intact.
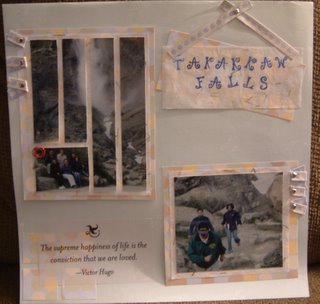
These techniques can make pictures which would normally be overlooked, stand out.
Feel free to play with your photos to see what cropping can bring to your scrapbook. You'll be happy with the results.
While the best way to properly frame your photos is with your camera, you still have a few chances to alter a photo before you use it in your layout.
Computer editing programs such as Photoshop or iPhoto are excellent resources for editing photos. If you don't have access to these programs or are working with photos which have all ready been printed, you can also crop them with scissors or a paper cutter.
The most interesting photos have a prominent subject. In most cases, a picture taken with the subject filling the entire lens is more captivating than one with a lot of background scenery.
In this case, the close-up of the puppy is more captivating than the second photo, which includes too much background.

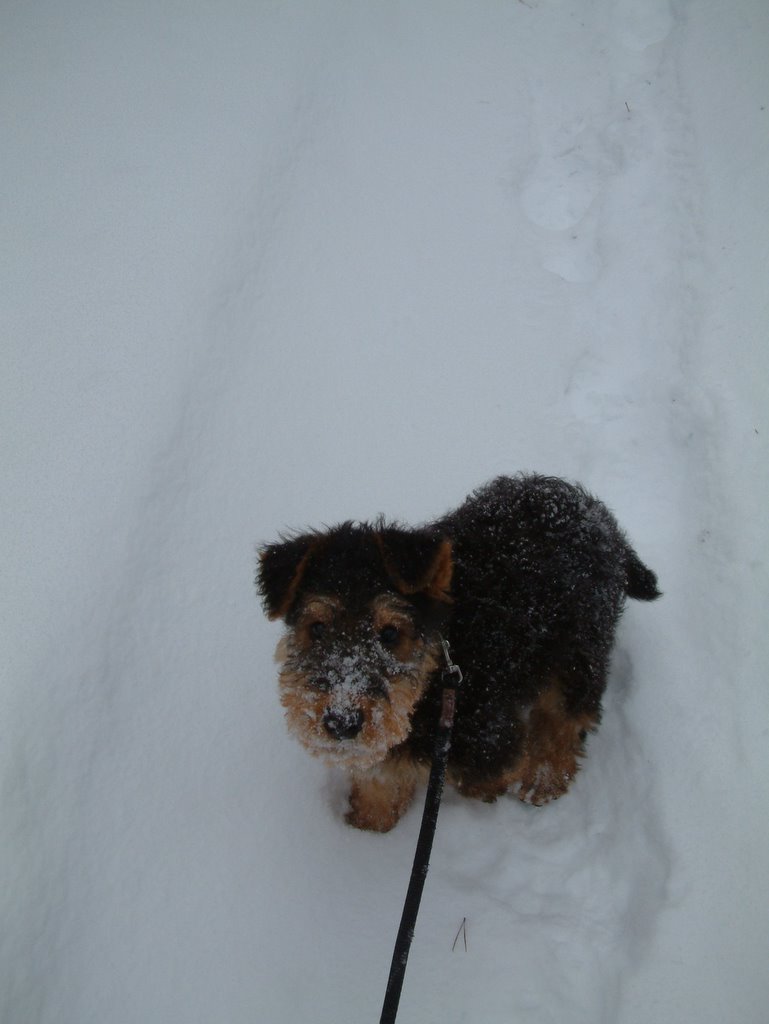
As you can see, cropping your photos can make a big difference.
While basic cropping is important, you can take it to the next level and heighten the appeal of your photos by being more creative.
Some quick ideas:
Divide your photo into equal parts (usually about 1" sections look best) and place them on the page, with a small gap between each section.
This technique is great for scenery pictures.


In this layout, the main photo is cropped using a similar method, but the focus is placed on the people in the corner, by leaving that section intact.

These techniques can make pictures which would normally be overlooked, stand out.
Feel free to play with your photos to see what cropping can bring to your scrapbook. You'll be happy with the results.
Sunday, January 29, 2006
Finding Free Fonts
Journaling can capture things that a photo can never portray. Smells, sounds, thoughts, textures, even sights outside the frame can end up forgottten without a few written reminders.
Being a creative person, when you picture your scrapbook layout, you don't imagine photos surrounded by fonts that you see every day.
Perhaps, you see snow-capped letters spelling out a title for a winter page or red and white candy cane letters for a Christmas layout.
The problem is, whenever you're looking for that perfect font, you can never find it at the scrapbooking store. On the off chance that you find exactly what you're looking for, it costs a fortune or you're stuck peeling off individual sticker letters.
To eliminate the hassle, start utilizing your computer. Journaling with your computer keeps your pages looking professional and still lets you capture the exact sentiments you envisioned.
Unique fonts found in even the most basic Word program can turn your ideas into tangible layouts that will be sure to impress.
You'd be surprised how many great fonts are already installed on your home computer. If you still can't find the perfect font, check out these websites to download new ones.
www.fontfreak.com/
www.fonts.com/
Saturday, January 28, 2006
The Best Scrapbooking Tool I Ever Found
The best scrapbooking tool I ever found has made my life so much easier. I don't know what I did before.
The funny thing is that I didn't find it in a scrapbooking store or a craft store or even a store at all. It was just sitting on someone's front lawn.
No, I wasn't going through someone's garbage....well, actually, I suppose in a way I was.
I found my amazing tool, a storage shelf, at a garage sale. Who knew that two dollars (the asking price was five) could be such a good investment??
Three pull out drawers, four fully functioning wheels, and an end to my cluttered, unorganized scrapbooking, all for a toonie. What a deal.
Of course, it was difficult to get home. Wedged in the backseat of a tiny Pontiac....with a carseat.....and an uncomfortable boyfriend. Priorities.
But, it made the trip, and it was worth it.
Organization is key to scrapbooking. If you spend twenty minutes gathering supplies and moving things around, you lose those precious minutes of crop time!
This garage-sale-find lets me keep my papers, stamps, adhesives, photos, everything right at my finger-tips; every spare minute can now be utilized. Perfect.
Hobbies are meant to be done in your spare time, which is when? Usually at night, when the kids are in bed, or you've finally finished your homework, or you're exhausted from whatever keeps you busy during the daytime. You don't have the time or the energy for anything that seems difficult.
For the sake of those photos you have crammed in envelopes or shoeboxes in closets all over the house, get organized! Enjoy your spare time! Put your memories in their best light!
All it takes is a toonie.
Friday, January 27, 2006
Simple Pleasure
The joy of scrapbooking is simple. It is an escape to easier times; scissors, glue, stickers, chalk, it's kindergarten all over again. Play time, with a small twist. You can do it as an adult, call it scrapbooking, and feel no shame.
It's an outlet for creativity, a chance to remember cherished moments, relive humorous events, and realize how special the people around you are.
It's cathartic.
So gather up some pictures, put on your favourite music, invite some good friends over or just enjoy the chance to spend some time with your own thoughts and let your mind escape the monotony of life's constricting boundaries.
Be creative.
You'll love it.
Tearing Paper, Even More Fun Than Scissors
One of the best ways to create dimension on a scrapbook layout is with torn paper.
This is such a simple method and can be used in a number of different ways to enhance your pages. Depending on what type of paper you use and the direction you tear, this look can provide you with a number of different styles in minutes.
Unless you're using cardstock, most papers have a coloured side and a white side. If you place the paper coloured side up and tear towards you, you will see a white edge appear, along the tear.
If you don't want that edge, simply flip the paper over, so the white side is facing up and again, tear towards you.
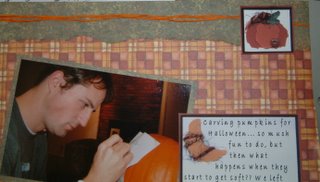
For a straight edge look, place a ruler over the paper and tear.
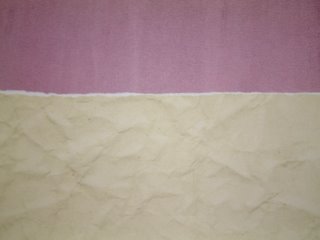
For a rougher look, tear the paper free-hand.
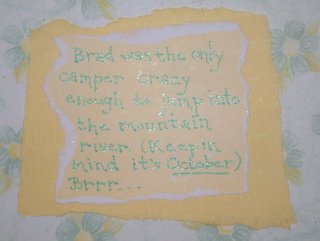
Now, apply this technique to as many different elements as you wish on each layout.
• photo mats
• embellishments
• journaling boxes
• borders
• photo corners
• titles
Once you get the basics down, you can use other methods such as chalking, stamping, or aging together with your torn paper to achieve an entirely new look.
This is such a simple method and can be used in a number of different ways to enhance your pages. Depending on what type of paper you use and the direction you tear, this look can provide you with a number of different styles in minutes.
Unless you're using cardstock, most papers have a coloured side and a white side. If you place the paper coloured side up and tear towards you, you will see a white edge appear, along the tear.

If you don't want that edge, simply flip the paper over, so the white side is facing up and again, tear towards you.

For a straight edge look, place a ruler over the paper and tear.
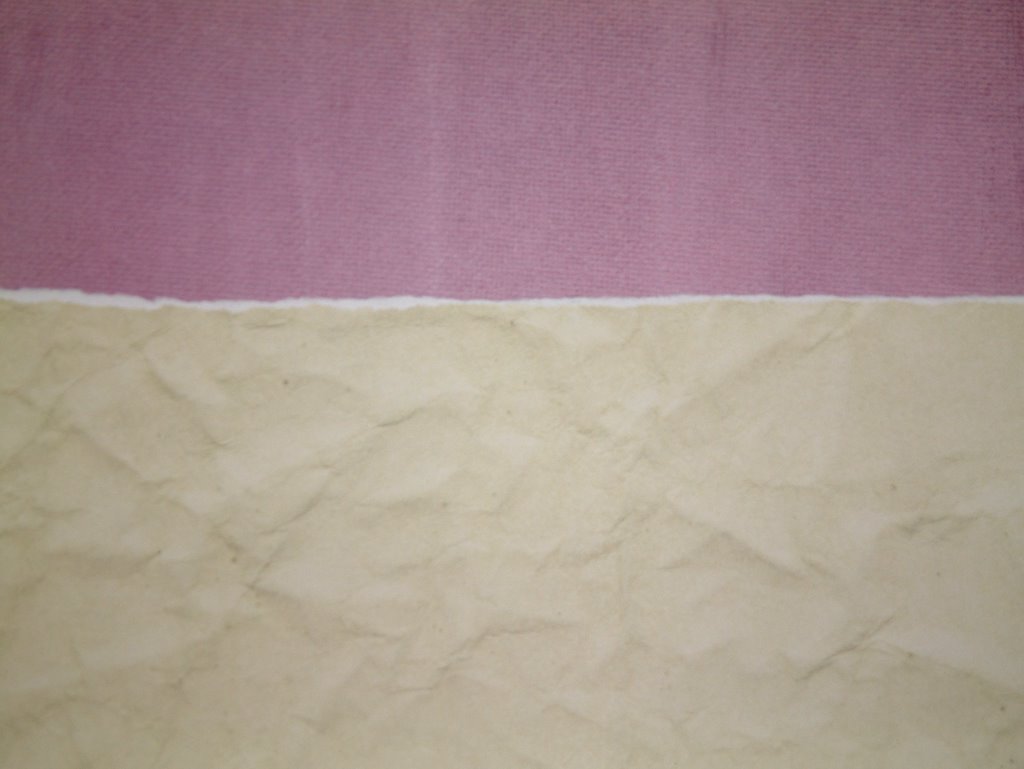
For a rougher look, tear the paper free-hand.
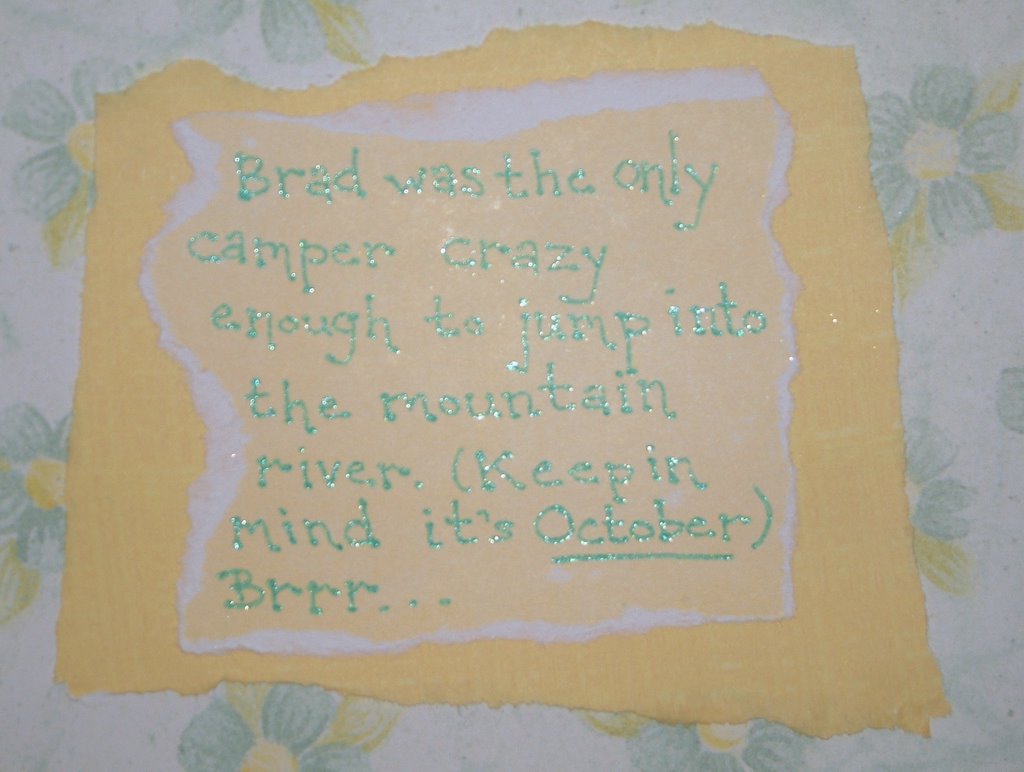
Now, apply this technique to as many different elements as you wish on each layout.
• photo mats
• embellishments
• journaling boxes
• borders
• photo corners
• titles
Once you get the basics down, you can use other methods such as chalking, stamping, or aging together with your torn paper to achieve an entirely new look.
Using words in layouts
Most people think of scrapbooking as a collection of pictures.
That's a good starting point.
While pictures are worth a thousand words, make sure that what you are trying to convey with pictures is captured using titles, quotes, journaling, or just random words on your layouts.
Whether it's just recording the date of a photo or an elaborate memory, words can help guide others through your scrapbook.
It's much easier to hand someone a scrapbook that explains everything for you. People can enjoy the layouts without asking, "what's happening here?" or, "where was this taken?"
Trust me, it's not only good for friends and family.
Titles and journaling are also an excellent way to refresh your own memory. It's so easy to say, "hmmm, I think John was about 2 in this photo" or, "I think that was Meyers Lake." Why not make sure that you remember everything about your special memories?
Feel free to experiment. Sometimes stories can even take the place of pictures.
You can still capture your son's first home run, when you left the camera at home or your best friend's surprise engagement, with no cameras nearby.
Simply write about it.
Words can be used to embellish and accentuate your most cherished pictures or can stand alone.
Try some of these web sites for more ideas on utilizing words, quotes, titles, and journaling into your scrapbooks.
www.quotemountain.com
http://www.theperfecttitle.com/
http://en.thinkexist.com/Scrapbooking_Quotes/
http://www.mycraftbook.com/Scrapbook_Journaling.asp
Subscribe to:
Posts (Atom)
